Showing posts with label Wood Crafts. Show all posts

Thursday, September 15, 2011

Art Project Display

Do you have a way to display your child art and school projects ? ?
Do you just put them on the fridge ? ?
Or just stick them in a drawer ? ?

We used to just put them on the fridge but after we got a new Stainless Steel Fridge we lost the ability to put them up there .. but to be honest I never really liked them up there, it always looked really cluttered and sometimes they would get wet, from little boys shaking the water off their hands instead of using the towel  4 inches way. So after our old fridge was hauled off I had to come up with a new way/ place to display all their projects. After blog hopping and website 'shopping' I came across a blog (forget the name now)  where the lady glued metal clips to a wire. And although hers turned out awesome I didn't really want to use metal clips, fearing they might rip one of the art pieces if they were even slightly tugged on and I had to metal clips anyway but I did have clothes pins handy. I also didn't have any wire but did have an 8ft long piece of wood, so after a quick cut in half I was on my way to a Masterpiece Display.

I made the ones for my boys months ago but recently my sister-in-law and a good friend had asked me to recreate ones for their little ones.

I started off by clipping the clothes pins on a box so they would be easier to paint.

After cutting the 8ft piece into two pieces,
I sprayed painted each one and once dry I whipped out the trusty tape measure and went to work measuring out equal spacing.  

Next use either a glue gun (my choice)
 or a strong glue to attach the clothes pins to the wood.

Next you can either free write your child's name, use vinyl to place their name on or go to Joanns, pick up a wooden letter, paint and attach like I did. (I need to go back and get the other two letters)


Here's a picture of ours in 'use'.

Tuesday, June 7, 2011

Summer Calendar

Hope you all had a fabulous weekend.

Quick Side note: If your a follower in AZ I pray that your nowhere near the devastating fires and if you are or know someone who is, my prayers are with you and your family.

Such a sad site to watch every night on the news.

On to the project. . . So two things happened with this 'little' project here.

#1 I highly underestimated how big/ long of a project it was and #2 I messed up my little 'date' stars big time which = to even more time.

*Oh and sorry ahead of time for the crappy pictures, I decided to hang it right in my laundry room area and no natural light shines in there so hence the blah pictures.

But here she is . .

I started out want to come up with an idea to display all the fun stuff I had planned for the boys during the summer, initially my idea was just to come up with something small to hang on our fridge but nothing I could think of 'worked'. So last week when I was spring cleaning, I came across this huge piece of sheet metal (2.5 ft by 3 ft) and off went my crafty light bulb.

I used my Cricut to cut out the days of the week with vinyl and used strips of vinyl to make my calendar grid.

Next problem was how to display the numbers for the days. . I first I wanted to used bottle caps but we don't drink anything with bottle caps and I didn't really want to wait to 'collect' them . . I'm not a sit-and-wait- patiently kind of girl. So off to Joann's I went, where I found these adorable little wood stars for $4.29 (plus a 40% off coupon) and even better than came in a pack of 30 . . score ! I attached a magnet to the back and mod podge the number on the front.

So what happened to the stars you ask ... well I tried to use mod podge dimensional and I've never used this stuff before and now was not the time to test it out, especially since I didn't have any extra stars to spare (pack of 30 remember ??) Well, I obviously need a lesson in how to use this stuff because I ruined 10 of my stars big time.. again I need a lesson because I don't know if I used to much or to little but they dried all bubbly and had air holes, bottom line they looked horrible. . . Back to Joann's I went for another Star pack, this time only mod podging! While I was at Joanns I hunted around for something to use to represent whatever I had planned for our summer days. I found exactly what I was looking for in the wood craft aisle, There were tons of already made little wood pieces and than right next to those were raw -wood squares, circles, ovals, stars etc.

First thing I grabbed was the Elephant perfect to represent our trips to the Zoo,I grabbed a few more already made ones but for the most part ended up grabbing a bunch of the raw wood shapes and painted them once I got home, while I was waiting for them to dry, I wrote down a list of some things I had planned, picked and choose which ones to make magnets for. Used the Cricut to cut out simple words and mod podge them onto the painted wood pieces of the already made ones.

Below are pictures of all the magnets I ended up with . . I even made some to represent the events we attend with our play group, Meetup Moms of Tucson. (A rubber duck is our mascot)
I loved how it turned out and the boys love checking it out for our 'fun for the day' as Taelor calls it . . I love all the magnets and cant wait to make more for future holidays and other events.
Happy Crafting !!

Tuesday, April 19, 2011

Quiet Please . . .

This past weekend was a good friends of mines baby shower and from the moment I received the Baby Shower invitation I was brainstorming ideas for a personalized gift since I knew the little ones name.

Side note: I love knowing baby's names ahead of time because I
absolutely love personalizing gifts.

Any who back to the brainstorming. . . So one night after the boys were in bed and I was surfing the Internet the doorbell rang and not just one ring but three!, AFTER the boys had just settled down. . . so after telling the solicitor it was outrageous for them to be ringing my door bell at 8pm ! !
I went back to my craft room and -ding-
the idea for a cute little plaque came to me.

I really like how it turned out and hope Jennifer and
baby Cam enjoy it for many years too come.

Wednesday, March 16, 2011

Lucky

Simple Last Minute Craft before St. Patricks Day.

I just took a piece of scrap wood we had in the garage
and spray painted it green.

While it was drying I used the Cricut to cut out my letters.
Mod Podge them onto the wood.

And decoreted the sides with a cute Shamrock
I picked up from Joannes for .59 cents.

I forgot to take a before picture but the Shamrock
had a wire attached to it, to hang up, but I cut the wire
and bow off and hot glued them to my wood.


Come back later for a really cute Kids Craft for St. Patricks Day

Wednesday, March 2, 2011

St Patricks Day Welcome


I started out with a piece of wood I painted green
And can I just say I HATE waiting for paint to dry :)

Than once again went through my scrap book paper
but this time pulled out all my greens
Plugged in the Cricut and went to work cutting out my letters.

While the letters were being cut, I found a Shamrock template online and printed it right on to my pattern paper . . I can barely cut a straight line much less free hand a shamrock !

After a little Mod Podge action . . .

and a quick clear coat, here it is . . . Happy Crafting !

Tuesday, February 8, 2011

Welcome Hearts

6 Days and counting till Valentines Day !

And we are in Valentine Craft Heaven over here at the Simply Crafty House :)
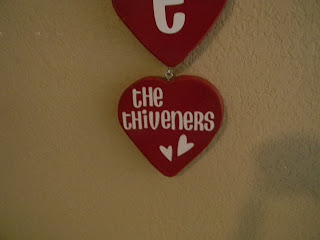
This weekend we made this Heart Welcome sign
and can I just say I L-O-V-E it ! !

This by far is my favorite project I've made.
We started off using a piece of wood we scored from
Home Depot for .51 cents ! . . . (We went into Home Depot a few weeks
ago and were browsing their .51 scrap wood bin, when we noticed a huge cart
full of 6ft -8ft pieces of wood with the green spray paint marking, indicating
their part of the clearance bin. . .Score ! ! ) I traced the hearts out using a .94 cents chocolate box from Wal-Mart.
Eating the Chocolates . . . optional :)
Than I handed the wood over to the Man with the power tools :)

As he cut out 20 hearts ! ! I started to paint them red.

After they dried I use the Don Juan cartridge to cut out my letters, than screwed hooks into the top and bottom of all of them except the bottom one.
Connected them together and ta-da . After it was finished I discovered two things

#1 This ended up being way longer than I accepted and

#2 I can't wait to make one for each holiday

The one I made for my mom :)

Isn't it the cutest ? ?
Happy Crafting ! ! !

Thrifty 101 featured me: Click here

Sew Woodys featured me: Click Here

Monday, February 7, 2011

Hugs and Kisses

One of my little men was sick this past weekend, so since we were home bound and he was sleeping most of the time, I got TONS of crafts done.

However, I'm trying to pace myself and not post them all at once

Here's a simple one I made with just some scrap wood, a heart cutout I picked up last week from Micheal's, red spray paint and the Cruicut.

Only thing I had to purchase was the chain to hang it up


Happy Crafting !!

Wednesday, February 2, 2011

Box of Hearts

How cute is this little box of hearts ? ?
I *heart* it :) First thing first, I started off with two of these little foam blocks I got at Dollar Tree.... I really don't like these things, I hate the sandy feeling they leave on my fingers and on the counter, but any who back to the craft ...

I had Mister Simply Craft, construct me a little box to fit perfectly, and snuggly around my two blocks, than I painted with two coats of white spray paint and one coat of clear coat.

When all was dried I cut a piece of bright pink cardstock perfectly to fit the front, than used the handy dandy Cricut to cut out my 'Be Mine' using the Don Juan cartridge. Next, I Mod Podge'd that one and again waited for that to dry.

Lastly, I stuffed some moss down into the box and then proceeded to stick in my heart sticks, I'm glad I decided to use some moss because under that moss lies tons of little holes from me repositioning the hearts :)

And here she is :)

Oops, I almost forgot I added a cute little heart to each side too.
This is so easy and could be easily made with scrap wood
and a quick trip to the Dollar store for the hearts.
If you end up making one I would love to see it .

I was featured over at Sweet Baby Hiccups
Click here to check out the feature !


Happy Crafting Everyone ! !
Related Posts Plugin for WordPress, Blogger...